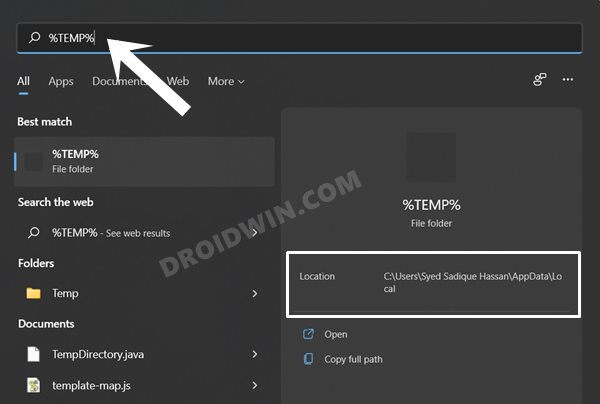
Suppose you wish to access the TEMP folder on your PC. Then the general approach is to use its complete directory, which is: C:\Users\UserName\AppData\Local\Temp. However, manually typing in the above location would call for a lot of effort. Well, even remembering this location is no easy task in itself. This is where the Environment Variables come in handy.
As far as the aforementioned location is concerned, Windows has assigned the TEMP or TMP keyword to it. So rather than typing in that lengthy location every time, you could simply make use of its associated variable. Along the same lines, Windows has also assigned the USERPROFILE variable to C:\Users\UserName. So instead of the complete address, you could just use the said keyword to go to that directory. Well, these were some of the variables that have been already created by Windows. Turns out, you could also create custom environmental variables for your preferred locations on your Windows 11 PC. And in this guide, we will show you how to do just that. So without further ado, let’s get started.
How to Create and Use Custom Environmental Variables in Windows 11
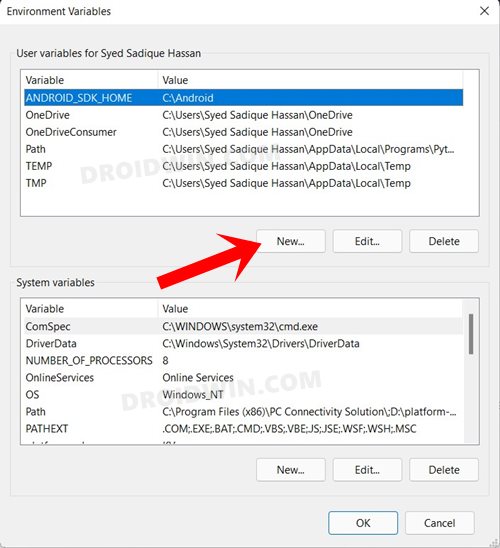
Before starting off with the steps, there’s an important point worth discussing. There exist two different types of variables: System and User Variables. The difference between the two? A System Variable is a global variable that could be accessed by every user that is using that system. On the other hand, a User Variable is directed towards a specific user only, so the user who is currently logged in to your system could access that variable. Now that’s understood, let’s check out the steps to create custom environmental variables on your Windows 11 PC. Follow along.
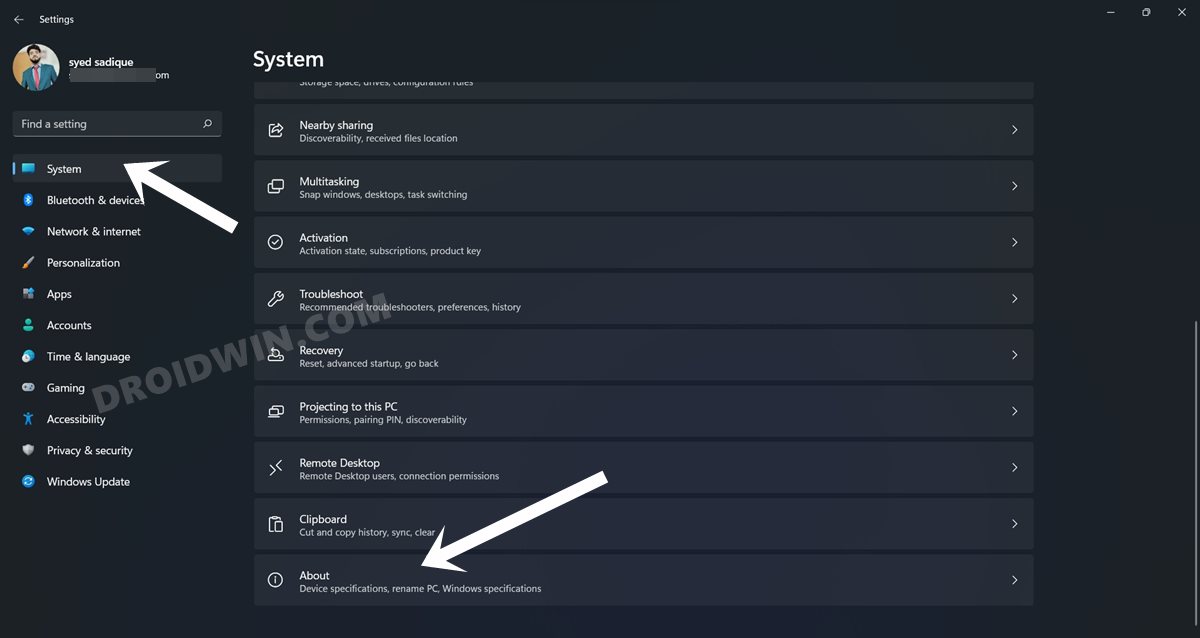
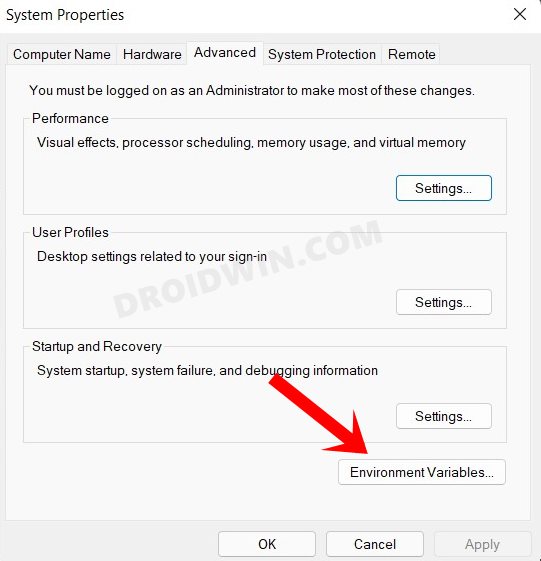
How to Create a New Environmental Variable in Windows 11
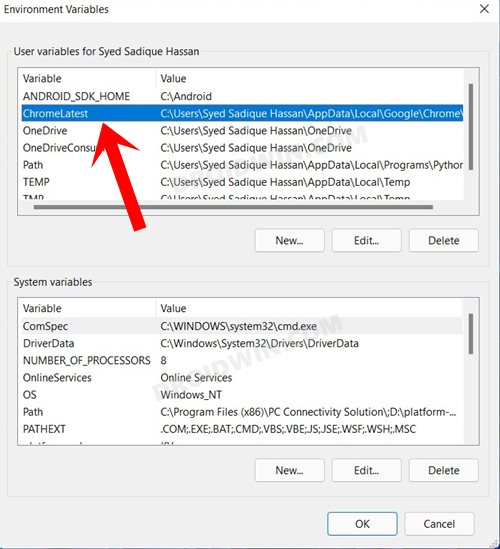
So with this, you have successfully created the custom environmental variables on your Windows 11 PC. Let’s now check out how to use it.
How to Use the Newly Created Environmental Variable in Windows 11
You could access your created environmental variables from various places, but let’s discuss the three most important and frequent cases:
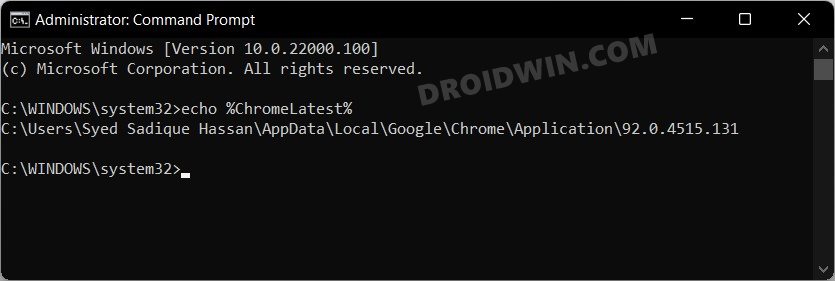
From Command Prompt
Via PowerShell Window
From Start Menu
That’s it. These were the steps to create and use new custom environmental variables on your Windows 11 PC. If you have any queries concerning the aforementioned steps, do let us know in the comments. We will get back to you with a solution at the earliest.
Can I Add Two or More Values under the Same Environmental Variable?
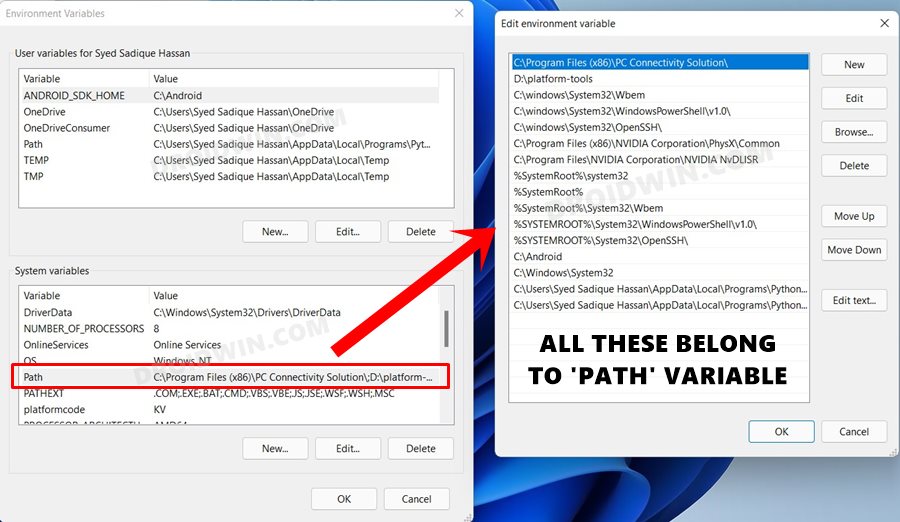
So some of you might ask that whether it is possible to create two or more values (locations) and add them under the same variable? Well, the answer is YES, it is definitely possible. You could check the same right away. Just select the Path System variable on your PC and hit the Edit button- there would already be a plethora of directories within it (and you could also populate it with more of your choices via the New button).
The one at the top of the list will be given the maximum weightage by Windows, so make sure you have your list sorted (or use the Move Up and Move Down keys for the same). As a personal recommendation, I would suggest not to add your own directories to the already created variables, unless the software specifically asks for the same. Rather consider creating your own and then you may add as many as you want inside that if the need arises.
How to Enable Group Policy Editor in Windows 11 HomeHow to Go from Windows 11 Developer Preview to Windows 11 Beta BuildDrag and Drop for Taskbar in Windows 11: Officially Removed?!Where is the Never Combine Taskbar Buttons in Windows 11
About Chief Editor
